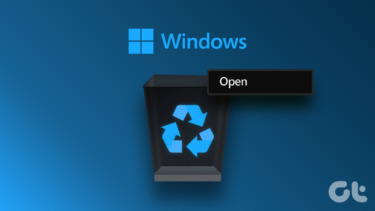
By scheduling Windows to empty your Recycle Bin automatically, you’ll save your storage space from filling out quickly. In this post, we’ll go through ways to automate the process of emptying Recycle Bin and ways to stop Windows from auto-deleting files on Windows 10. So, let’s get right into it.
How to Schedule Windows to Empty Recycle Bin
There’s a couple of ways you can auto-delete files from the Recycle Bin. You can either use the Storage Sense option in the Windows 10 settings menu or use the Task Scheduler to schedule the task to repeat periodically. Here are both.
Method 1
You can enable and configure the Storage Sense on Windows 10 to empty Recycle Bin automatically. Step 1: Press Windows Key + I to open Settings and go to System. Step 2: In there, navigate to the Storage settings using the left sidebar. On your right, turn on the Storage Sense option if it isn’t already. After that, click on Configure Storage Sense or run it now. Step 3: On the following page, tick the box for ‘Delete temporary files that my apps aren’t using’ under Temporary Files. After that, use the drop-down menu to select from the available time period options. You can choose to purge the contents of the recycle bin daily, bi-weekly, monthly, or once every two months. Once configured, Windows will automatically empty files from Recycle Bin.
Method 2
Alternatively, if you want more options while setting up a schedule to empty Recycle Bin, you can use the Task Scheduler on Windows 10. Step 1: Open the Start menu, type in task scheduler, and press Enter. In the Task Scheduler window that opens, right-click Task Scheduler Library and pick New Folder. Give that folder an appropriate name such as ‘New Task’. Step 2: Right-click on the newly created folder and choose the Create Task option from the list. Step 3: In the Create Task window, give this task a suitable name such as ‘Auto Clear Recycle Bin’. Step 4: Now switch to the Triggers tab, and click on the New button to set up a trigger for this particular task. Step 5: Here, you can choose from the multiple ways to initiate the task. For instance, you can choose to begin the task on a schedule, at log on, at startup, etc. Next, enter an appropriate time and date and then select to set it to repeat daily, weekly, or monthly. Then click on OK. Additionally, you can also set an expiry date for this trigger under the Advanced settings. Step 6: Now switch to the Actions tab and select New. Step 7: Under Settings, in the Programs/script box, type cmd.exe. In the Add arguments box, paste the command given below and press OK. Then, select OK again. Now that the task is created successfully, it’ll automatically empty the Recycle Bin whenever the trigger conditions are matched.
How to Stop Recycle Bin from Deleting
If you want to stop Windows from deleting files from Recycle Bin automatically, you can easily do so by turning off Storage Sense or deleting the task in the Task Scheduler.
Using the Storage Sense
If you’ve enabled Storage Sense on Windows 10, here’s how to stop it from emptying Recycle Bin automatically. Step 1: Press Windows Key + I to open Settings and go to System. Step 2: In there, navigate to the Storage settings using the left sidebar. On your right, turn off the Storage Sense switch. To further configure Storage Sense, click on the ‘Configure Storage Sense or run it now’ option. Step 3: On the following page, under Temporary Files, use the drop-down menu to select Never. That’s it. Windows will now never delete the files from the Recycle Bin unless you do it manually.
Task Scheduler
If you’ve used the Windows Task Scheduler to empty Recycle Bin periodically, here’s how to stop the task. Step 1: Open the Start menu, type in task scheduler, and press Enter. Step 2: In the Task Scheduler window, right-click on the created task and simply Delete it. Alternatively, if you wish to enable the task in the future, just disable the task instead of deleting it.
Don’t Be Trashy, Recycle
Setting up Recycle Bin to auto-delete files can be a useful way to manage storage on Windows. If you’re looking to free up more storage space for your PC, consider clearing cache memory as well to free up space without losing any of your files. The above article may contain affiliate links which help support Guiding Tech. However, it does not affect our editorial integrity. The content remains unbiased and authentic.


